|
|
|||
|
George Ledo Magic Cafûˋ Columnist SF Bay Area 3044 Posts 
|
I've been thinking for a long time about a follow-up article to my series on illusion and prop design, this time illustrating the actual steps used in conceptualizing and designing an illusion. I was really planning to have some fun with it. But it seems that every time I get started on it, another project comes up.
Ah, the reality of making a living. So yesterday I decided that maybe I don't need to make up a new illusion to do this article. Since the steps are really the same, I can just use one of my recent stage designs. All the drawings are already there, so all I need to do is pick a few that illustrate the process, put them in order, and load them up. And keep the verbiage to a minimum. I'm going to use a play I did last year, titled An Inspector Calls, by J.B. Priestley. The story is set in England in 1911, during the Edwardian period, and concerns a suicide by a young female factory worker and the subsequent investigation. But the story is really about how the upper classes of the period tended to isolate themselves from any social responsibility. Step 1 in the process was reading the play and doing some preliminary research on the Edwardian period: the history, the general mentality (and how it differed from the Victorian period), the class structure, and the architecture. I also watched the movie ã made in 1954 and starring Alastair Sim ã knowing full well that it went beyond the story in the play itself. Step 2 was a meeting between the director and myself, to talk about the story and the characters and the themes and the period and what she wanted to say with the play. It took about an hour, and I don't recall either one of us mentioning doors or entrances or platforms or any technical stuff. Instead, the term ãisolationã kept coming up. Sounds kinda boring, but it really wasn't: I walked out of there with a much better understanding of who these characters were than I had before, and a good sense of what kind of house they would have. Step 3 was going over the script again, this time to get a sense of what was going on physically: who came in, who left, what they were doing, and so forth. The entire story takes place in the dining room, right after a formal dinner to celebrate the daughter's engagement to a (rich, of course) young man. Now I was getting a sense of the traffic patterns, but that theme of isolation from the world kept coming up over and over. Step 4 was grabbing my sketchbook and a pencil and trying to ãphysicalizeã (is that a word?) this sense of isolation. We had a nice big stage to work with, so my first impulse was to create a smallish dining room in the center of the stage, not connected to anything. Floating in a sea of black. And very close to the audience. Below is a page from the sketchbook, which is 8 ô§ x 11 inches. This is how just about all my sets begin; notice the drawings are very small and loose, and very informal. They're for me and me alone. At this point I'm thinking about the shapes that will help develop the themes in the story ã the architecture, the traffic, the characters, and the fact that theater doesn't have to be literal. There's no way I could have been this loose at this point with anything other than a pencil. Besides, I was sitting comfortably in my living room with a mug of coffee. 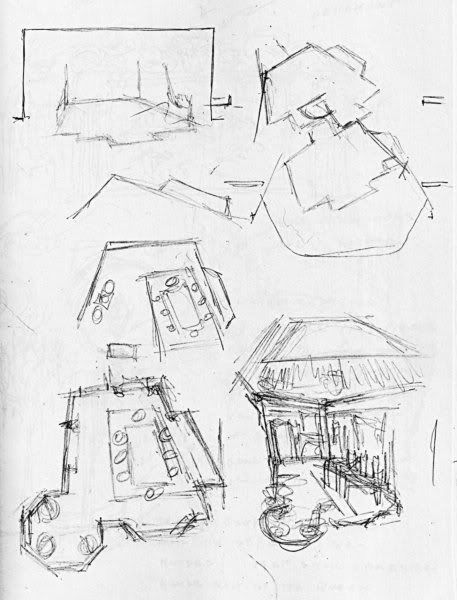 After a few sketches, I put down the notebook and went off to do something else, leaving those shapes to rattle around inside my head. Later, I came back and looked at them again, realized they worked, and decided to go in that direction. What I like about these ãthumbnail sketchesã is that I can whip out a whole bunch quickly, and look at different approaches, before I settle on one. The direction for this show came about very quickly, but I've done other sets where I've done literally dozens of these tiny sketches. Design isn't about right or wrong; it's about solving problems and making choices, and the more sketches I do the more choices I can put into them. As I get close to a direction, I find that I'm just refining the same little sketch over and over. And that's when it's time to move on to the next step. Step 5 (below) was to see how this concept would fit on the physical stage. I had a CAD drawing of the stage, so I decided to just go for it instead of doing it on paper. But again notice how loose the drawing is: I'm just focusing on the size and placement and angle of the set, and not on the details. Even so, it took a good couple of hours before I was happy with it. It was at this point that I decided to go with a forced-perspective look and ãfloatã the set off the stage floor, but that's another story. 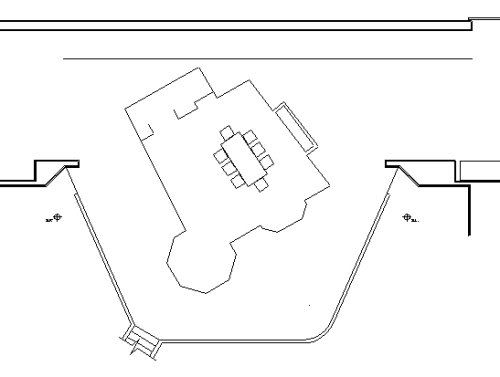 Step 6 was to look at this again, make a few corrections, and import it into SketchUp to develop it in 3D. A few more hours, and the result (below) was a computerized version of what we call a ãwhite model.ã This was what I showed the director at our next meeting, right on the computer, so I could ãwalk herã around the set. I find directors and choreographers love being able to see the set from different directions while it's still a work in progress. 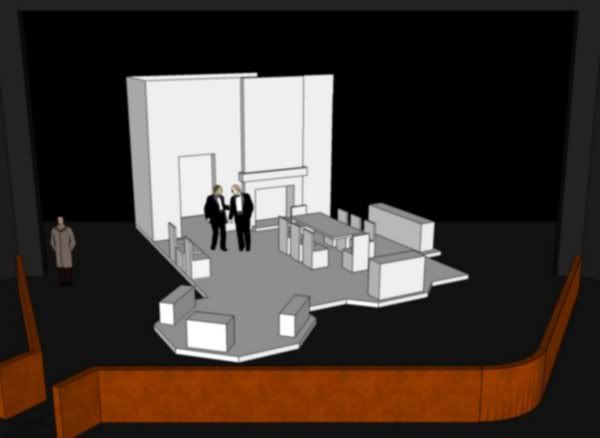 Once she and I agreed to go in this direction, it was time for Step 7, which was to develop the white model into a finished model. At this point I did some more research, this time into architectural details, interior dûˋcor, and furniture. The sketchbook came out again (below) as I worked out some of these details. 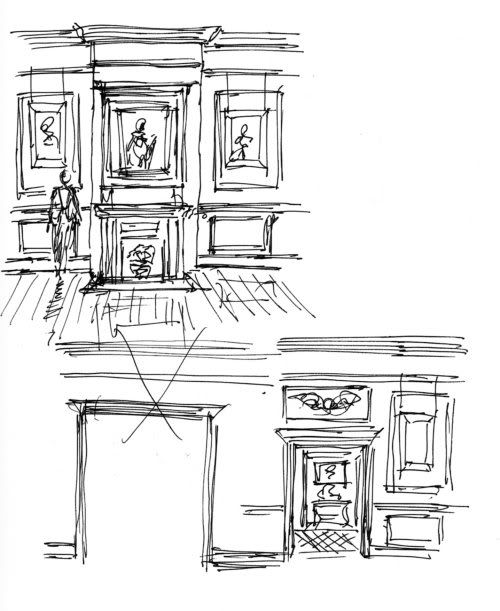 Eventually, the SketchUp model was done and ready for another meeting. This time there was enough detail to show the floor, walls, colors, furniture, and artwork, but not to excruciating, photo-realistic detail. SketchUp was intended for use as a conceptual design tool, not as a rendering tool, and I find this is fantastic for my work, since the rendering (or the model) is just a means to an end, and not the end in itself. It's very easy to get so carried away with the model or the rendering that the time and the money are gone before construction begins. The final rendering is shown below. 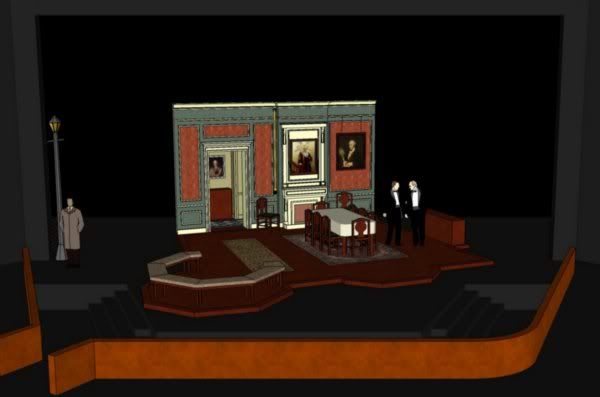 Incidentally, I showed this to the cast at their first rehearsal, again right on the computer, and they loved being able to ãfeelã the space and walk around it. On subsequent shows, I've used a video projector, plugged into the laptop, to project the model onto the wall so it's larger and easier to see, especially for a large cast. It's the same effect as the old days, when I used to make a physical scale model and show it to the cast, but now I just need to carry the laptop and the projector. Step 8 was to prepare the design drawings in CAD, including finalized floor plans, elevations, sections, and details. One of these, the drawing for the fireplace, is shown below; I did all these in 11x17 format, just for convenience, instead of the more common 24x36 size. 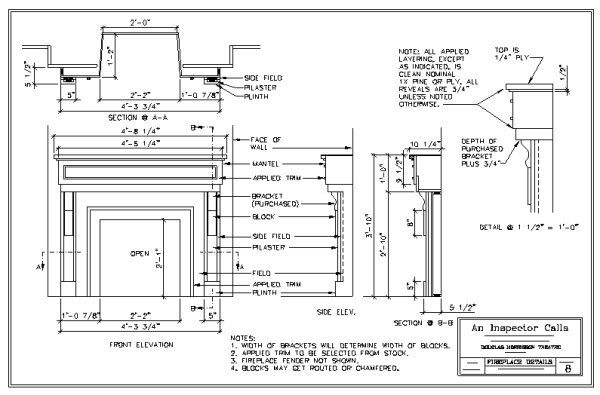 I also blew up some of the architectural details (below) and printed them out for the shop crew, so they would be able to visualize them better. The fireplace ended up being painted to look like stone, but there was no need to show it on the rendering. 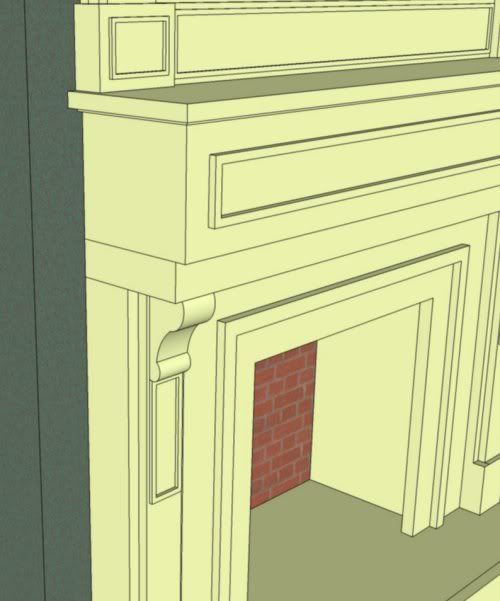 So there it is: a set design from start to finish. There's nothing sacred about the steps and the sequence, but most of us follow this general format. It's also the format used by architects and lots of other other designers, and it works. Start with the forest and then get into the trees and the branches and the leaves. Do your research. Understand what you're trying to do. Have fun with it: let yourself be creative. And use the right tools for the job. As usual, if you have any questions or comments, please feel free to PM me.
That's our departed buddy Burt, aka The Great Burtini, doing his famous Cups and Mice routine
www.georgefledo.net Latest column: "Sorry about the photos in my posts here" |
|
ringmaster Inner circle Memphis, Down in Dixie 1974 Posts 
|
We had a lecturer a few months back who demonstrated his technique of defining and fin tuning scenic elements using photoshop and then building flats out of large LED screens. And the results were impressive. The sample he used was for a one shot fund raising dinner. Lead time four weeks, budget high six figures, jut for sets.
I understand Darren Brown is going this route, now. I fell old and useless.
One of the last living 10-in-one performers. I wanted to be in show business the worst way, and that was it.
|


